Home > About TJ > Renovation > Photo Upload Instructions
Photo Upload Instructions
For Teachers
- From a school teacher station (not your laptop), double click on the R drive
- Navigate to the Renovation Pics folder
- Copy your pictures or videos into this folder
For Community Members
E-mail your pictures or videos to renovationpics@tjhsst.edu
For Students
- If you do not already have it, please download and install WinSCP. If you are using a school computer, then WinSCP is already installed.
- Run WinSCP and a box will appear as shown below.
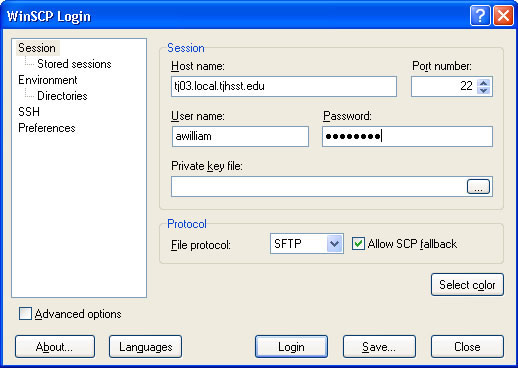
- Enter the following details into the window as shown in the screen above:
- Host Name: tj03.local.tjhsst.edu
- User name: Your TJ username (eg: awilliam)
- Password: Your TJ password (the same one you use to log into Intranet)
- Click on the "Login" button in the bottom center of the window
- If this is the first time you have run WinSCP from this computer, you may see a box appear with a warning message at this point. If the box appears, please click "Yes".
- You will now have a window that is split vertically down the middle. The left side shows files that are on your computer; the right side shows files that have been uploaded to TJ's server.
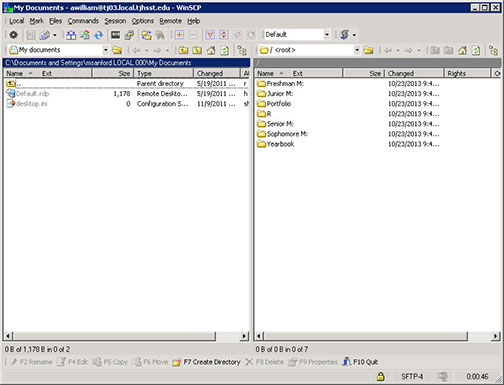
- On the right side of the WinSCP window, double-click on the "R" folder, then double-click on the "Renovation Pics" folder (you may have to scroll down)
- On the left side of the WinSCP window, locate the pictures you wish to upload. Then click and drag the photos from the left side of the screen to the right side of the screen to copy them to TJ's servers. If a box pops up, click on the "Copy" button.
- When you are finished uploading files, you can close WinSCP by clicking on the red X in the upper right corner.